Overview
P3I inserts 1 to N user-selected picture or graphic files into a Microsoft PowerPoint ® presentation. The P3I human interface is comprised of a single "main" screen from which the user selects, at a minimum, the following:- A PowerPoint (aka PPT) template slide that specifies the precise layout of pictures, optional captions, and an optional title.
- Picture and/or graphics files which are subsequently inserted into a PPT presentation based on the aforementioned template's layout.
P3ICLI Front-End
In point of fact, P3I is nothing more than a GUI that serves as a script-generator for P3ICLI. Consequently, if P3ICLI is not currently installed on the host PC, P3I won't work.P3ICLI is free software and may be compiled and installed from its source files, or installed directly from a pre-compiled binary distribution.
Creating A Template File
It's not strictly necessary to understand how P3ICLI works, but it is vital to understand how to create a template file. Refer to the P3ICLI reference manual for step-by-step details.P3I Main Screen
Throughout this document, it may be helpful to refer to an actual image of P3I's main screen, which is provided below. Note that this is a clickable image. Simply click on any area of the user interface for which immediate help is desired. Otherwise, continue reading the manual.![[P3I main screen UI]](p3i_main.png)
Basic Usage
To insert pictures and/or graphics into a PowerPoint presentation, follow these steps:- Use the Browse Template button to select a PowerPoint file that includes at least one P3ICLI-compatible template slide. Hereafter, this file is referred to as the template file.
- Next, click the Read Layout button, which forces P3I to read layout information from all slide(s) existent in the template file.
-
If the template file contains more than one slide,
click the Template Slide spinner to
select the desired template slide.
At this point, P3I knows which template slide will be used to place pictures, optional captions, and an optional title in a PPT presentation. All that remains is to specify a selection of picture/graphics files and subsequently send them to PowerPoint.
- Use the File Sorting options to specify whether a list of files returned via the Browse Files button is sorted in ascending or descending lexicographical order, or not at all.
- Click the Browse Files button to locate a directory containing the desired picture/graphics files. This button invokes a Windows common open dialog box that is capable of traversing both local and network-based file systems.
- If necessary, use the Files of Type filter in the common open dialog box to specify a wildcard pattern that displays the desired files.
- Within the common open dialog box, use standard Windows selection techniques to select the filenames of one or more pictures/graphs. When satisfied with your selections, press the dialog box's Open button. All selected filenames will be sorted, if specified in step 4, and then appended to P3I's Selections list.
- If the selected template slide contains P3ICLI-compatible caption or title shapes, then the Add Caption or Add Title checkboxes may be used for this purpose.
-
Click the Files
->PPT button to open a communication channel with an existing instance of Microsoft PowerPoint. If PowerPoint is not currently running, it is started. In either case, P3I generates a script that P3ICLI subsequently uses to effect the following PowerPoint actions:
- The desired template slide is inserted into the current PPT presentation,
- Picture/graphics files are inserted into the template's unpopulated picture shapes. Insertion order is specified by the lexicographical order of the picture shape names. For example, assume a template slide's picture shape names are "pic3", "pic1", and "pic5". In that case, the first inserted picture/graphics file is placed in the shape name "pic1", then "pic3", and finally "pic5".
- When all picture shape(s) in the current slide have been populated with picture/graphics files, the template slide is duplicated and the process repeated until the specified list of picture/graphics files is exhausted.
Selecting Pictures/Graphics With Drag and Drop and Windows Explorer
It's also possible to select and drag filenames from Windows Explorer and subsequently drop them into P3I's Selections list control. Here's how:- Use P3I's File Sorting options to specify whether filenames are sorted in ascending or descending lexicographical order, or not at all.
- Launch Windows Explorer and navigate to a directory containing the desired pictures/graphics.
- Using standard Windows selection techniques, select one or more filenames in the Windows Explorer display panes, drag same to the P3I Selections list, and drop (i.e., release the left mouse button).
- Dropped filenames are sorted, if specified in step 1, and then appended to the Selections list.
Paste Filenames From The Clipboard
If the Windows clipboard contains a list of graphics/picture file paths, they may be appended to the Selections list via one of the following Edit menu commands:- Paste unsorted -- append clipboard file paths as is.
- Paste sorted ascending -- sort file paths in ascending order and then append.
- Paste sorted descending -- sort in descending order and then append.
For the sake of completeness, P3I also provides the following clipboard operations that move or copy data from the Selections list to the clipboard:
- Copy -- copy selected file paths to the clipboard.
- Cut -- same as Copy, plus the selected file paths are also removed from the Selections list.
Changing P3I's Default Configuration
A number of P3I's features are user-configurable via the configuration screen. To examine and/or change the current configuration, select Edit | Configuration from P3I's menu bar.The remainder of this manual describes various P3I user interface controls, as well as other related topics.
Browse Template Button
Launches a Windows common open dialog box that selects a P3ICLI-compatible template file. Template files may also be specified via P3I's Template File MRU List feature.Read Layout Button
Once a template file is selected, its template data (e.g., number of picture shapes, captions, etc.) must be determined. The Read Layout button directs P3I to read and store the template data associated with each of the template file's slide(s).Once the template file's layout has been successfully read, the file's path is stored in P3I's Template File MRU List for future recall.
Template File MRU List
P3I remembers the last 20 template files accessed via the Read Layout button and makes them available in a Most Recently Used (MRU) list stored within a Windows combo box control. The combo box list provides quick recall of frequently used template files.Template Slide Spinner
When a template file contains more than one slide, use this spinner to select the desired object.Template Slide Information
Once a template file's layout has been read, P3I displays "interesting" template information, including:- Total number of template file slides,
- Number of picture shapes on curent template slide,
- Number of caption shapes on curent template slide,
- Whether or not current template slide contains a title shape,
- Text of template slide's first comment. Comment text can serve as a memory aid for identifying the purpose of the currently selected slide. For example, the comment "3 pics, no caps" would seem to suggest that the current slide contains 3 picture shapes and no captions.
View Template Button
Use this button to invoke PowerPoint for the purpose of viewing the currently selected template slide. When finished viewing the template, close the slide's active PowerPoint window. Otherwise, P3I may append pictures to the template, thereby damaging its usefulness for future P3I activities.Caption
This feature, which is enabled by clicking the Add Caption checkbox, adds a user-specified caption string to each caption shape that's paired with a corresponding picture rectangle on the currently selected template slide. This implies that a caption string will be created for caption shape "cap1" if and only rectangular picture shape "pic1" exists. Likewise, a "cap2" caption string will be created if and only if retangular picture shape "pic2" exists, etc.P3I constructs caption text by concatenating up to three optional strings, in this order:
- Caption Prefix,
- Numeric Suffix,
- Leaf Filename of the inserted graphic/picture.
In most cases, one space is inserted between the prefix and suffix, but see the list of caption features for an important exception. Two spaces are inserted between the leaf filename and any preceding text.
Notes:- A leaf filename's suffix (e.g., ".png", ".jpeg", etc.) is stripped from the caption.
- Caption text may include UTF-8 characters if the UTF-8 Text option is enabled on the P3I configuration screen.
-
If a Numeric Suffix value is
specified, P3I increments this value each time a caption is added to a
table cell. For example:
Caption Prefix: "Figure" Numeric Suffix: "1" Generated Captions for four graphics/picture files: Figure 1 Figure 2 Figure 3 Figure 4 -
If the last character of the Caption Prefix
is a dash ("-"), period ("."), or comma (","),
a space is not inserted between the prefix and suffix. For example:
Caption Prefix: "Figure 1-" Numeric Suffix: "1" Generated Captions for four graphics/picture files: Figure 1-1 Figure 1-2 Figure 1-3 Figure 1-4 -
For the purposes of caption formatting, a leaf filename is split into
distinct words at these delimiter boundaries:
- space (e.g., c:\temp\Avg Growth Chart.png),
- underscore (e.g., c:\temp\Avg_Growth_Chart.png),
- mixed case transition (e.g., c:\temp\AvgGrowthChart.png).
The latter two delimiters must be explicitly enabled via the Underscore and Mixed Case checkboxes. Assuming these checkboxes are checked, P3I transforms each of the above leaf filenames into the caption string "Avg Growth Chart".
Creating Descriptive Object-Specific Captions
If a leaf filename adequately labels its content,
then P3I's caption formatting facilities make it possible to create on the
fly captions that uniquely label each inserted graphics/picture object.
For example, consider this scenario:
Caption Prefix:  "Figure 2-"     Numeric Suffix:  "1"

Filename Captioning enabled

Selections List: c:\temp\Etch Rate Aug 9.jpeg
                 c:\temp\Etch Rate Aug 10.jpeg
                 c:\temp\Etch Rate Aug 11.jpeg

Generated Captions:

        Figure 2-1  Etch Rate Aug 9
        Figure 2-2  Etch Rate Aug 10
        Figure 2-3  Etch Rate Aug 11
Keep this capability in mind when naming graphics/picture files.
Title
This feature, which is enabled by clicking the Add Title checkbox, adds a user-specified title string to a template slide's title shape. The creation of title strings is identical to that of caption strings, with a single exception. When the Add Filename to Title checkbox is checked, the name of the first file inserted in the current slide is added to the generated title string.
File Sorting Options
When multiple filenames are appended to P3I's Selection list via the Browse Files button, it's often useful to first sort the filenames in ascending or descending order, especially if the names include time-date stamps that facilitate meaningful lexicographical order. Filenames may be sorted in ascending or descending order, or not at all.Browse Files Button
Launches a Windows common open dialog box that selects picture/graphics files. Within this dialog box, any of these file selection techniques are available:- Doubleclick a single filename to automaticaly move it to P3I's Selections list.
- Click a single filename and then click the Open button to move it to the Selections list.
- Select multiple files using the standard Windows Shift+Click or Ctrl+Click operations. Move multiply selected files to the Selections list by clicking the dialog box's Open button.
- When the common open dialog box has keyboard focus, select all files by pressing Control+A and then clicking the Open button.
Note: Multiple file selections are sorted in accordance with the setting of the File Sorting control.
Selections List
Once one or more filenames have been added to this list, send them all to Microsoft PowerPoint by clicking the Files-> PPT button.
When the Selections list has keyboard focus, selected filenames may be deleted from the list (but not from disk) by pressing the Delete or Backspace keys. This list control supports these filename selection techniques:
- Click a single filename to select it. The single click operation unselects all previously selected files.
- Select multiple files using the standard Windows Shift+Click or Ctrl+Click operations.
Finally, all filenames may be deleted from the list (but not from disk) by clicking the Clear Selections button.
Files -> PPT
Click this button to import all files in the P3I
Selections list into a Microsoft
PowerPoint presentation.
Remove Slide Comments
If a template slide includes PowerPoint comment(s) that document its purpose and/or layout, propagation of the comment(s) into the presentation that P3I creates is probably not desirable.Checking this option strips all PPT comments from a template slide immediately following its insertion (duplication) into (within) the PowerPoint presentation that P3I creates. Comments are never removed from any slide resident within the parent template file.
Note that this feature is only supported by P3ICLI version 1.4 or greater.
Copy Source Formatting
Checking this option specifies that P3ICLI copies background slide formatting information (e.g., design, color scheme, gradients, etc.) from the "source" template slide during the execution of a P3ICLI script. This option is desirable when the source template slide includes background graphics that are required to appear on the presentation that P3I generates. Examples of such background information include (but are not limited to):- a company logo
- a footer that includes slide numbering information
- a standard company color scheme
Note 1: user-defined textures cannot be copied from the source template for any version of PPT released prior to Office 2007, since no programmatic support exists for this formatting feature.
Note 2: this feature is only supported by P3ICLI version 1.6 or later.
Slide Size
Checking this option forces a P3I-generated presentation into the 4:3 slide size aspect ratio used prior to the release of Office 2013. Note that Office 2013 and later default to a 16:9 default aspect ratio.This feature is only supported by P3ICLI version 2.2 or greater and is only relevant when Office 2013 or later is installed.
Miscellaneous Menu Commands
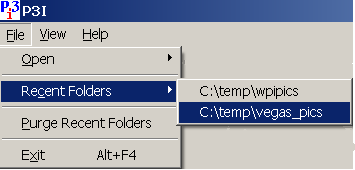
Recent Folders
P3I remembers the last 20 folders from which pictures were selected. Any of these folders may be quickly revisited via the File menu's Recent Folders submenu.The Purge Recent Folders submenu erases the list of remembered folders.
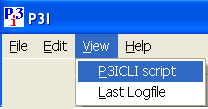
View P3ICLI Script
The View menu's P3ICLI Script submenu may be used to view the P3ICLI script that P3I generates based on current input parameters. This submenu is enabled if, and only if, P3I's Files-> PPT
button is enabled. Use this feature to learn P3ICLI syntax or to save
script(s) for later replay by P3ICLI.
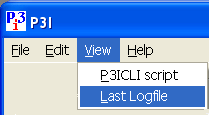
View Last Logfile
The View menu's Last Logfile submenu may be used to view the logfile that P3ICLI created the last time the Files-> PPT
button was clicked.
The log file contents can be useful for
diagnosing problems, such as attempts to load nonexistent/inaccessible
graphics/picture filenames, as well as documenting P3I/P3ICLI bugs
:-) . The log file format is simple:
Line 1:  program exit code (i.e., number of errors detected)
Line 2:  error/warning/informational message #1 (if any)
Line 3:  error/warning/informational message #2 (if any)
                etc.
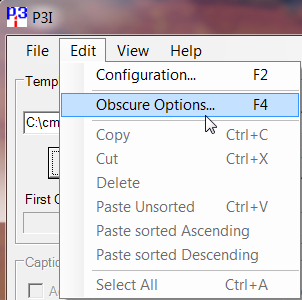
Obscure Options
Permits configuration of a handful of rarely used P3ICLI options. Click the Obscure Options submenu beneath the Edit menu for access and documentation.